 Save
Save My kitchen counter used to make me feel guilty—carrot peels, onion skins, celery ends all destined for the compost. Then one afternoon while prepping vegetables for dinner, I realized I'd been throwing away flavor. I started saving scraps in a bag, and when it finally filled up three weeks later, I made my first pot of broth. The kitchen smelled incredible, like I'd somehow captured the essence of a farmers market and simmered it down to pure gold.
I made this broth the night before my sister visited, and when she walked in, the whole apartment smelled like a slow-simmered secret. She asked what I was cooking, and I got to tell her the truth—nothing fancy, just scraps becoming something whole. She stayed for soup, and we talked about how her grandmother used to do the same thing, wasting nothing. That broth connected us across years and kitchens.
Ingredients
- Vegetable Scraps (5-6 cups): Carrot peels, onion skins, celery ends, leek tops, and mushroom stems are your foundation—save them in a bag in the freezer until you have enough, then use them straight from frozen.
- Bay Leaves (2): These anchor the broth with subtle earthiness, so don't skip them even if they seem humble.
- Black Peppercorns (8-10 whole): Keep them whole so they release flavor gradually without turning the broth cloudy or overly spiced.
- Garlic Cloves (2, optional but encouraged): Smash them lightly to wake up their flavor and let them perfume the entire pot.
- Fresh Herbs (1 small handful): Parsley stems and thyme sprigs add brightness, and using the stems means nothing from your fresh herbs goes to waste.
- Salt (1-2 teaspoons): Start with less and taste as you go—you can always add more, but you can't take it back.
- Cold Water (2 liters): Using cold water helps draw out flavors more gently than hot water would.
Tired of Takeout? 🥡
Get 10 meals you can make faster than delivery arrives. Seriously.
One email. No spam. Unsubscribe anytime.
Instructions
- Collect and Prepare Your Scraps:
- Gather clean vegetable trimmings as you prep meals throughout the week—store them in a freezer bag so they're ready when you decide to make broth. Frozen scraps work beautifully and sometimes even release their flavors more easily than fresh ones.
- Build Your Broth Base:
- Place all your scraps, bay leaves, peppercorns, garlic, and herbs into a large stockpot, then pour in the cold water and add your salt. Stir once to distribute everything evenly.
- Bring to Heat:
- Turn the heat to medium-high and let the liquid come to a gentle boil—you'll see small bubbles breaking the surface and catch the first real aroma of the broth forming. Once you see this, immediately reduce the heat to maintain a slow, steady simmer.
- Simmer and Skim:
- Let the broth bubble gently for the full hour, and every 15 minutes or so, use a ladle to skim off any gray-white foam that rises to the top—this keeps your final broth clear and clean-tasting. Don't worry if you miss some; it won't ruin anything.
- Taste and Adjust:
- After an hour, turn off the heat and taste a spoonful of the broth itself—this is when you'll know if it needs more salt or if the flavors feel complete. Trust your palate here; there's no perfect answer, only what tastes right to you.
- Strain Through Mesh:
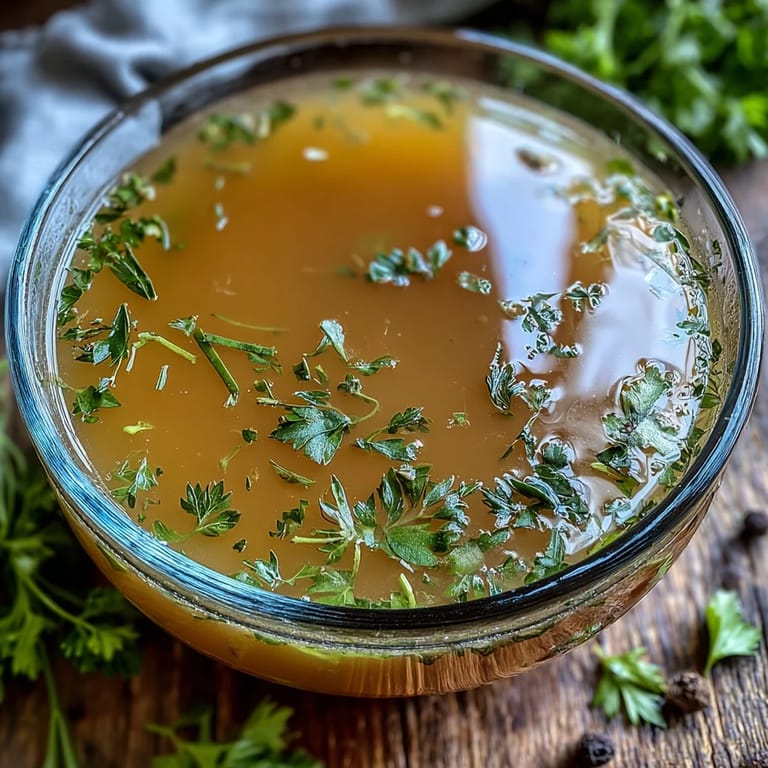
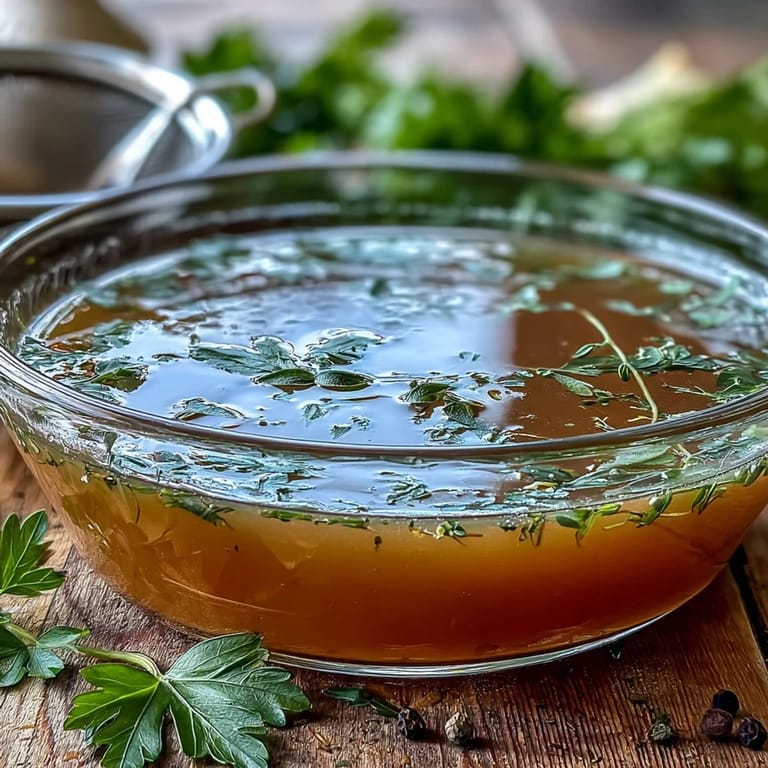
- Pour the broth slowly through a fine-mesh sieve lined with cheesecloth into a large bowl, letting the liquid drip through naturally without forcing it. The longer you let it drain, the clearer your broth will be.
- Cool and Store:
- Let the broth cool to room temperature before transferring to airtight containers—this prevents condensation and keeps it fresher longer. Refrigerate for up to 5 days, or freeze in portions for up to 3 months so you always have broth on hand.
 Save
Save There's something almost meditative about watching scraps transform into something useful and beautiful. My son now saves his vegetable peels without being asked, and he gets genuinely excited when the freezer bag gets full enough to make broth. We've turned what used to feel like waste into an actual event in our kitchen.
Vegetables to Always Save
Over time, I've learned which scraps make the best broth. Carrot peels bring natural sweetness, onion skins add depth and color, celery ends contribute that savory backbone, and mushroom stems introduce an umami note that makes everything taste richer. Leek tops are often overlooked, but they're secretly wonderful. Even potato peels add body to the broth if you use them sparingly. The combination matters more than any single ingredient—it's the sum of these small parts that creates something greater.
Flavor Additions Worth Trying
Once you master the basic broth, you can play with additions to deepen its character. A piece of kombu seaweed adds an almost savory richness, while a dried shiitake mushroom brings earthiness that makes you feel like you're sipping something ancient and wise. I've also experimented with a star anise or a cinnamon stick for a broth with warm undertones—it's wonderful in Asian-inspired soups or even sipped on its own when you need something comforting. The beauty is that you're not locked into one version; each batch can be a little different based on what you have and what you're hungry for.
Beyond Soup
This broth is miraculous as a soup foundation, but it's also quietly powerful in other places. I use it to cook grains like rice or quinoa, which absorbs the broth's gentle flavor and becomes instantly more nourishing than anything cooked in plain water. You can use it to braise vegetables, dissolve into sauces, or even drink a warm cup of it plain on a quiet morning. One winter, I froze it in ice cube trays so I'd always have broth on hand for quick cooking, and it genuinely changed how I approach weeknight dinners.
- Freeze broth in ice cube trays so you can grab small portions for cooking grains or finishing sauces without thawing an entire container.
- Label your containers with the date so you know exactly how old it is—old broth still tastes fine, but it's nice to rotate through your supply.
- If your broth looks gelatinous after refrigerating, that's not a problem; it means you've created something with real body and substance.
 Save
Save Making broth from scraps is how you learn that abundance isn't about having more—it's about using what you already have with intention and care. Every time you open a container of frozen broth, you're holding proof that nothing was wasted.
Recipe FAQs
- → What vegetables work best for homemade broth?
Carrot peels, onion skins, celery ends, leek tops, mushroom stems, garlic skins, and parsley stems create the most balanced flavor. Potatoes (peeled) also add body.
- → Which vegetables should I avoid?
Skip cruciferous vegetables like broccoli, cauliflower, Brussels sprouts, and cabbage. These can impart a bitter taste and overpower the delicate aromatics.
- → How long can I store vegetable broth?
Keep refrigerated in airtight containers for up to 5 days, or freeze for up to 3 months. Portion into freezer-safe bags or containers for easy thawing.
- → Can I enhance the umami flavor?
Add a piece of kombu seaweed or dried shiitake mushrooms during simmering. Both ingredients deepen the savory notes without altering the vegetable profile.
- → How should I collect scraps?
Store a large resealable bag in your freezer. Add clean vegetable trimmings as you cook. When full, you'll have roughly 5-6 cups—the perfect amount for broth.