 Save
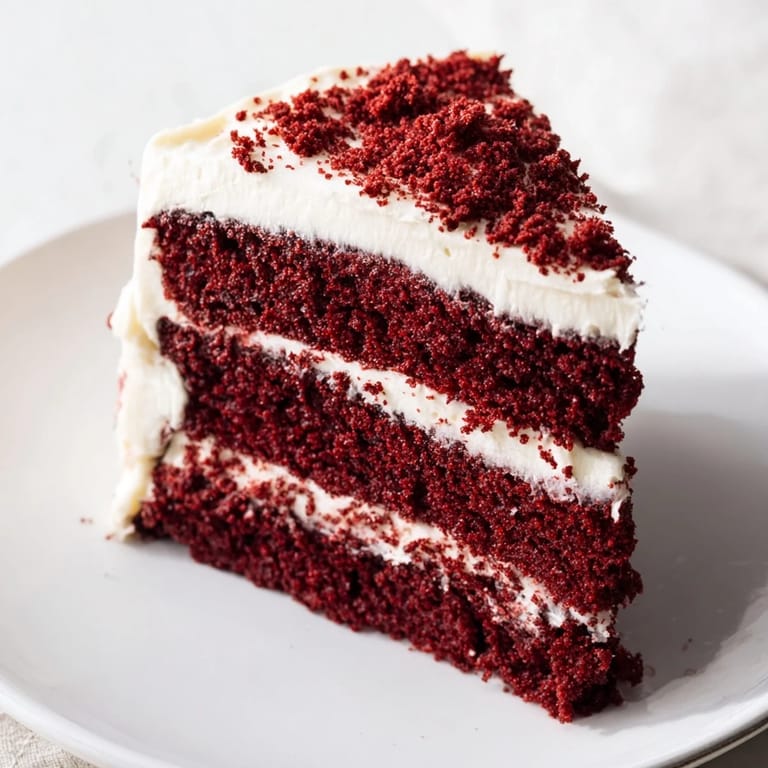
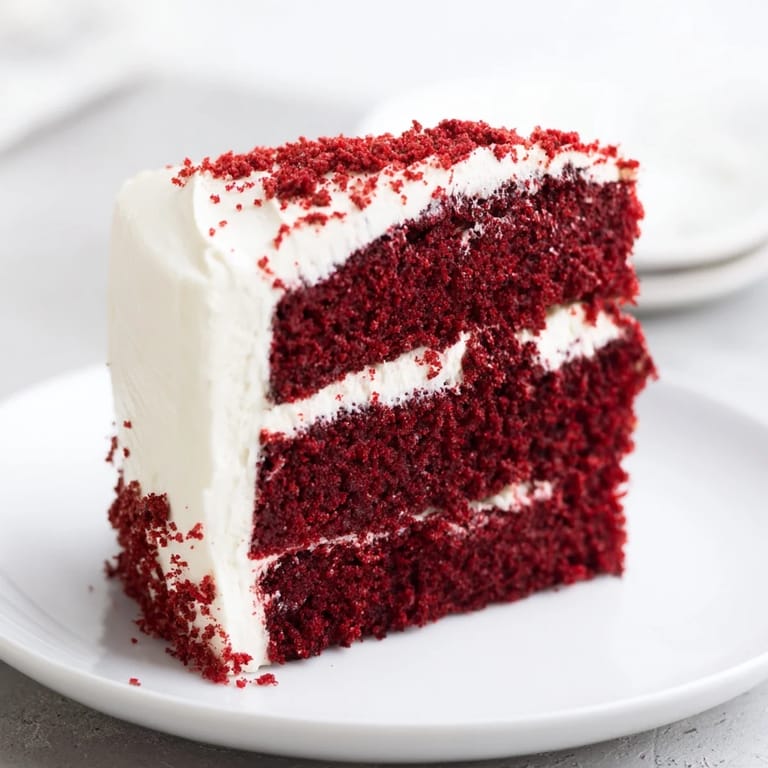
Save My grandmother kept a red velvet cake in her kitchen for every milestone—birthdays, anniversaries, even Tuesday afternoons when she felt like making someone smile. I watched her cream butter and sugar until it looked like clouds, and I remember the exact moment she added that vivid red food coloring and the whole bowl transformed into something almost magical. The first time I made it myself, I was nervous about getting that signature velvety texture just right, but the smell of cocoa and buttermilk mixing together was so distinctly hers that my hands remembered what to do.
I baked this cake for my best friend's engagement party, and I'll never forget how her mother took one bite and got quiet in that specific way that means someone's memory just got triggered. She told me her own mother made red velvet cake exactly like this, and suddenly we were all three standing in the kitchen talking about people who've passed and traditions we want to keep alive. That's when I realized this cake carries something beyond chocolate and frosting—it's a quiet promise to show up for moments that matter.
Ingredients
- All-purpose flour: The foundation—make sure it's measured by spooning and leveling, not scooping straight from the bag, or you'll end up with a dense cake that defeats the whole velvety purpose.
- Unsweetened cocoa powder: This gives you that subtle chocolate note without making it a chocolate cake; it's the secret that makes people ask what's different about this version.
- Baking soda and salt: The baking soda reacts with the vinegar and buttermilk to create lift and that tender crumb you're after.
- Granulated sugar and softened butter: Room temperature butter creams properly, and creaming well means air bubbles that make the cake light instead of heavy.
- Eggs and buttermilk: Both need to be room temperature or they won't incorporate smoothly—this is one of those details that actually matters.
- Vanilla extract and white vinegar: The vinegar adds tang and brightness; the vanilla rounds everything out without announcing itself.
- Red food coloring: Gel coloring gives a deeper, more elegant red than liquid, but liquid works fine if that's what you have on hand.
- Vegetable oil: This keeps the cake moist longer than butter alone would; it's the ingredient that makes leftovers stay tender.
- Cream cheese and butter for frosting: Both softened means your frosting won't have lumps, and it'll spread like a dream.
- Powdered sugar: Sift it first or you'll spend ten minutes beating out lumps; trust me on this one.
Tired of Takeout? 🥡
Get 10 meals you can make faster than delivery arrives. Seriously.
One email. No spam. Unsubscribe anytime.
Instructions
- Set yourself up for success:
- Preheat to 350°F and prepare your pans while you gather ingredients—there's something grounding about having everything ready before you begin. Grease and flour generously, tapping out the excess so the cake releases cleanly.
- Build your dry base:
- Sift flour, cocoa powder, baking soda, and salt together into a bowl. Sifting isn't just about breaking up lumps; it aerates the flour and helps distribute the leavening evenly.
- Cream sugar and butter until clouds form:
- This usually takes three to four minutes with an electric mixer—you want it pale and fluffy, almost doubled in volume. This step is where the cake gets its tender structure, so don't rush it.
- Add eggs one at a time with intention:
- Beat well after each egg so they fully incorporate; this helps emulsify everything and creates a smooth batter. If the mixture looks a little broken, don't worry—the next steps will bring it together.
- Work in oil, vanilla, and vinegar:
- Mix until combined but don't overbeat. The vinegar will make the mixture look slightly curdled, which is exactly what you want.
- Combine buttermilk and food coloring:
- Stir until the color is even and consistent. If you're using gel coloring, whisk it in extra well so there are no streaks.
- Alternate wet and dry ingredients with a gentle hand:
- Start with dry, then buttermilk, then dry, then buttermilk, then dry—always ending with dry. Mix on low speed just until combined; overmixing develops gluten and makes the cake tough instead of tender.
- Divide and bake with patience:
- Split the batter evenly and bake for 28 to 30 minutes, testing with a toothpick in the center. The cakes should be set but still have a slight spring when you press the top.
- Cool properly to avoid collapse:
- Let them rest in the pans for ten minutes—this prevents them from breaking apart—then turn them out onto wire racks. Don't frost until they're completely cool or the frosting will melt right off.
- Make frosting that tastes like love:
- Beat cream cheese and butter until completely smooth, then add powdered sugar gradually while beating. Once it's light and fluffy, add vanilla and a pinch of salt to make everything taste a little brighter.
- Assemble with confidence:
- Place one layer on your cake plate, spread frosting on top, add the second layer, then frost the top and sides. A bench scraper makes this easier, but a regular knife works too.
 Save
Save The first time someone I loved told me this cake tasted just like their childhood, I understood why my grandmother kept making it. It's not the fanciest cake, and it's not the most difficult, but it's the one people remember—the one they taste and suddenly feel held by something familiar and warm.
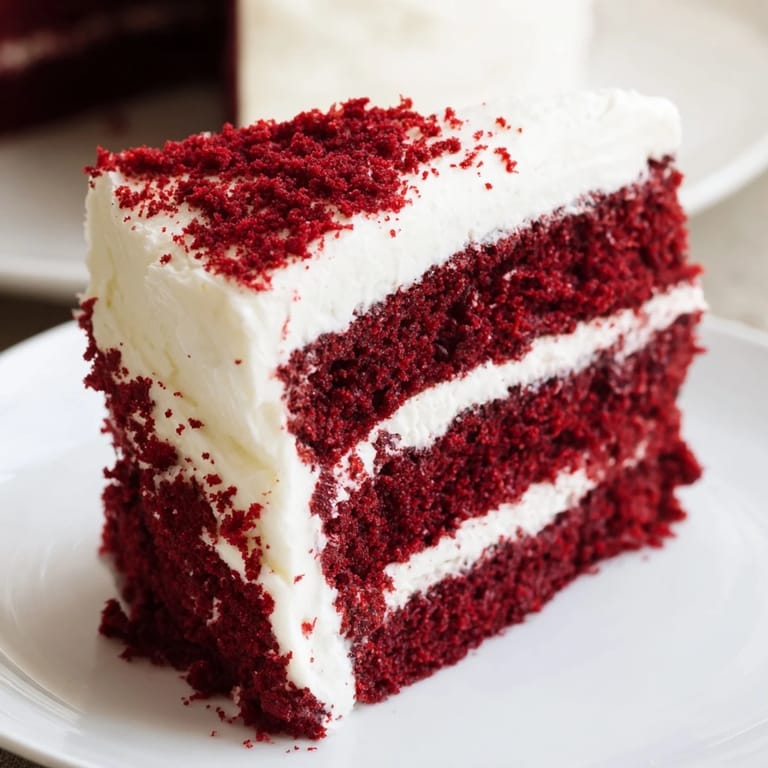
The Science of the Velvety Crumb
What makes red velvet cake different from chocolate cake is actually simple chemistry. The combination of buttermilk and vinegar creates an acidic environment that reacts with the baking soda, creating lift and a tender crumb. Add just a touch of cocoa powder—not enough to make it taste like chocolate cake, but enough to add richness and depth—and you've got the signature velvety texture that makes this cake famous. The red food coloring is mostly theatrical, but it matters because we eat with our eyes first, and that deep red promises something special.
Frosting Secrets That Make the Difference
Cream cheese frosting is less forgiving than buttercream, but once you understand it, you can make it perfect every time. The key is starting with softened cream cheese and butter—not melted, but soft enough that your finger leaves a slight indent. Beat them together until they're completely smooth with no lumps, then add powdered sugar gradually while continuing to beat. If you dump all the sugar in at once, you'll get a grainy frosting that never smooths out. The pinch of salt isn't optional; it balances the sweetness and makes the frosting taste more sophisticated.
Make It Your Own
Once you've made this cake a few times and it feels natural in your hands, you can start playing with it. Some people add a hint of espresso powder to deepen the cocoa flavor, while others use almond extract instead of vanilla for something unexpected. You could dust the frosting with crushed freeze-dried berries for tartness, or garnish with delicate cake crumbs for texture. The base recipe is solid enough to handle your creativity.
- For a more dramatic presentation, add a handful of crushed cake crumbs to the sides of the frosted cake—it looks intentional and hides any imperfect frosting edges.
- If you're making this ahead, bake the layers a day early and wrap them tightly; they'll actually stay more moist overnight.
- Leftover frosting freezes beautifully for up to a month, so you can make extra and save it for emergency cake situations.
 Save
Save This cake has a way of becoming tradition before you realize it. Make it once and people will ask for it again and again, until it's the cake everyone associates with you and the moments you've shared together.
Recipe FAQs
- → What gives red velvet cake its unique color?
The distinctive red hue comes from adding red food coloring to the batter, which highlights the cocoa’s subtle flavor.
- → How do buttermilk and vinegar affect the cake?
Buttermilk and vinegar tenderize the crumb and add a slight tanginess, enhancing the overall moistness and flavor balance.
- → Can I use gel food coloring for a deeper color?
Yes, gel food coloring intensifies the red shade without altering the batter's consistency.
- → What is the best way to cool the cake layers?
Let the cakes cool in their pans for 10 minutes, then transfer to wire racks to cool completely before frosting.
- → How can I store this dessert to keep it fresh?
Cover and refrigerate it for up to 5 days to maintain freshness and frosting texture.
- → What tools are essential for preparing this cake?
Two 9-inch cake pans, mixing bowls, an electric mixer, spatula, wire cooling rack, and a sifter are recommended.