 Save
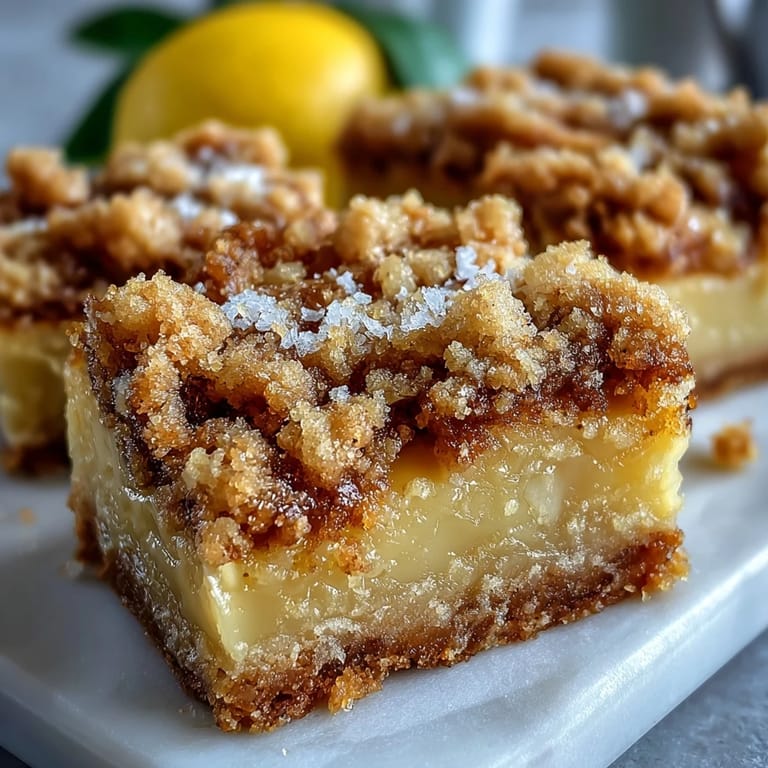
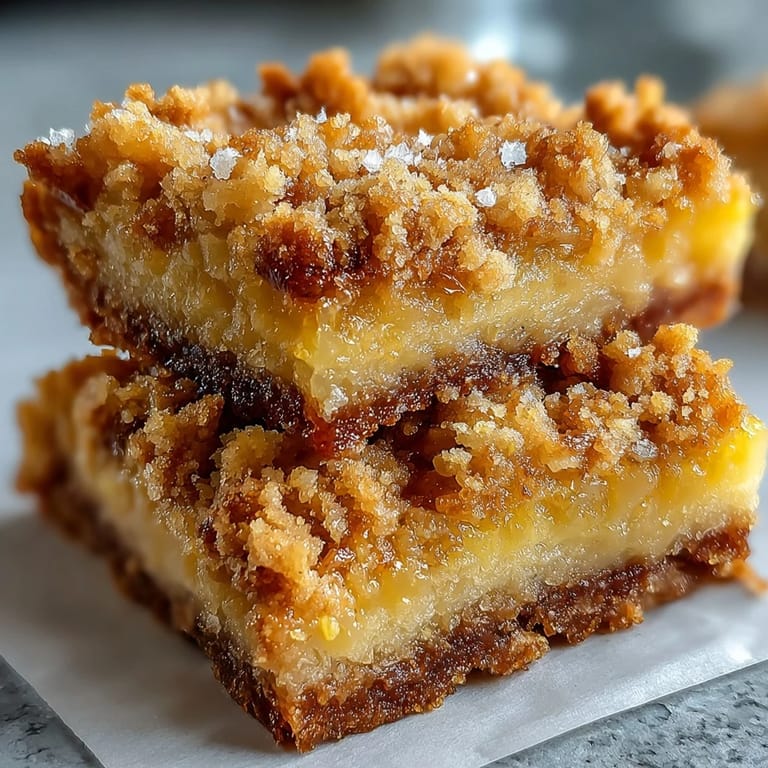
Save My kitchen windows were wide open one warm Saturday morning, and the scent of lemon zest drifted out into the yard where my neighbor was trimming hedges. Within minutes, she was at my door asking what I was baking. That's the power of these lemon crumb bars: they announce themselves before anyone even takes a bite. The balance between tart lemon filling and buttery crumb is something I stumbled upon after a few trials, and now it's the recipe I turn to whenever I need something bright and comforting at once.
I made these for a spring book club meeting, and they disappeared faster than any chocolate dessert I'd brought before. One friend, who usually skips sweets, ate two squares and asked for the recipe on the spot. There's something about the combination of tender filling and crisp, golden crumbs that feels both nostalgic and new. Even my brother, who claims he doesn't like lemon desserts, admitted these were different.
Ingredients
- All-purpose flour: This is the backbone of both crust and filling, providing structure without heaviness.
- Granulated sugar: Used generously in the filling to balance the tartness of fresh lemon juice.
- Baking powder: A small amount in both the crust and filling helps create a tender, slightly lifted texture.
- Salt: Just a pinch sharpens the lemon flavor and keeps the sweetness from feeling flat.
- Unsalted butter: Melted and mixed into the crumb, it creates that melt-in-your-mouth richness.
- Large eggs: They give the filling its silky, custard-like consistency once baked.
- Fresh lemon juice: Bottled juice won't give you the same brightness, fresh is essential here.
- Lemon zest: This is where the floral, aromatic lemon flavor lives, don't skip it.
- Powdered sugar: Optional but lovely for a soft, snowy finish just before serving.
Tired of Takeout? 🥡
Get 10 meals you can make faster than delivery arrives. Seriously.
One email. No spam. Unsubscribe anytime.
Instructions
- Prep the Pan:
- Preheat your oven to 350°F and grease or line your 9x9-inch pan with parchment for easy lifting later. This step saves you from prying bars out with a spatula.
- Mix the Crumb Base:
- In a medium bowl, stir together flour, sugar, baking powder, and salt, then pour in melted butter and mix until it looks like wet sand. Reserve half a cup for topping and press the rest firmly into the pan.
- Bake the Crust:
- Slide the pan into the oven for 10 to 12 minutes until the edges just start to turn golden. You want it set but not deeply browned.
- Whisk the Lemon Filling:
- While the crust bakes, whisk eggs and sugar together until smooth, then add lemon juice, zest, flour, baking powder, and salt. Make sure there are no lumps.
- Assemble and Bake:
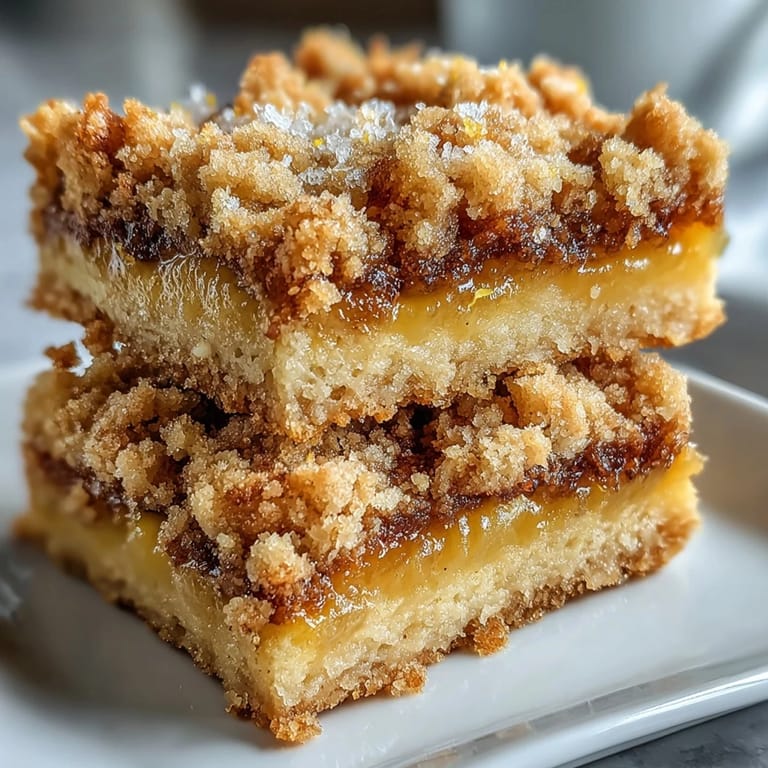
- Pour the lemon mixture over the hot crust, sprinkle the reserved crumbs on top, and bake for another 20 to 25 minutes until the filling is set and the crumbs are golden. Let it cool completely in the pan, then chill for at least an hour before slicing.
 Save
Save One afternoon, I brought a pan of these to a family gathering, and my aunt quietly wrapped up three bars in a napkin to take home. She later told me they reminded her of something her own mother used to make, though the recipe was long lost. That moment made me realize these bars carry more than flavor, they hold the kind of comfort that connects generations.
Storing and Serving
These bars keep beautifully in an airtight container in the fridge for up to a week, though they rarely last that long in my house. I like to dust them with powdered sugar right before serving so the topping stays snowy white. They're wonderful with hot tea in the afternoon or as a light finish to a heavy meal.
Flavor Variations
If you want to experiment, swap the lemon for lime juice and zest for a more tropical vibe. You can also fold in a handful of fresh blueberries or raspberries into the filling before baking. I've even added a thin layer of raspberry jam between the crust and filling for a fruity twist.
Troubleshooting and Tweaks
If your filling seems runny after baking, it likely needed a few more minutes in the oven or an extra tablespoon of flour. The texture should be firm enough to hold its shape when sliced but still tender and custardy inside. If the crumb topping browns too quickly, tent the pan loosely with foil for the last few minutes of baking.
- Make sure your oven runs true to temperature, an oven thermometer can save you from underbaked centers.
- Line your pan with parchment that overhangs the edges so you can lift the whole slab out for cleaner cuts.
- Let the bars come to room temperature for about 10 minutes before slicing for the neatest edges.
 Save
Save These lemon crumb bars have become my go-to whenever I want something that feels both effortless and impressive. I hope they bring as much brightness to your table as they have to mine.
Recipe FAQs
- → Why must I chill the bars before cutting?
Chilling allows the lemon filling to set completely, ensuring clean cuts without the bars falling apart. The chilling time also enhances the texture, making the filling more stable and the flavors more pronounced.
- → Can I use bottled lemon juice?
Fresh lemon juice delivers superior brightness and depth of flavor. Bottled juice may result in a flatter taste and could affect the filling's consistency. Fresh zest also adds essential citrus oils that bottled options lack.
- → How do I know when the filling is set?
The filling should no longer jiggle like liquid when you gently tap the pan. The center should appear set, though slightly soft is fine as it will firm further during chilling. The crumb topping should be golden brown.
- → What's the purpose of reserving crumb mixture?
Setting aside half the crumb mixture creates two distinct layers—the pressed crust base and the textured topping. This gives you both structural support and that appealing crumbly, buttery finish on top.
- → Can I make these ahead of time?
These bars keep beautifully in the refrigerator for up to a week. In fact, they often taste better the next day as the flavors meld. You can also freeze them for longer storage, wrapping individually for easy thawing.
- → Why is the crust baked before adding filling?
Par-baking the crust prevents it from becoming soggy when the wet lemon filling is added. This technique ensures a tender yet sturdy base that can support the generous layer of citrus filling without getting mushy.