 Save
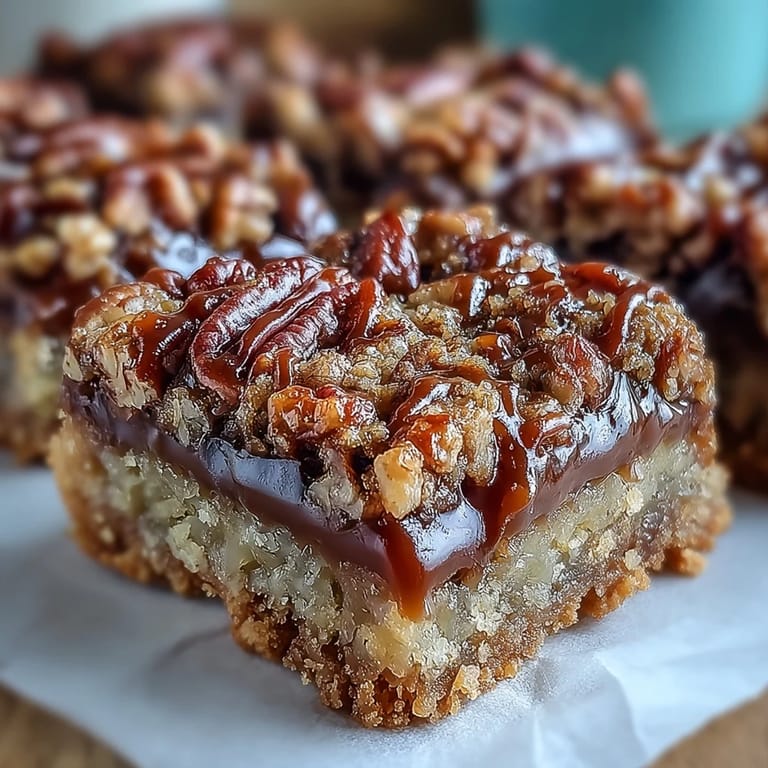
Save My neighbor knocked on the door with a crinkled recipe card and a knowing smile, insisting I try what she called "the bars that disappear." I was skeptical until I pulled my first pan from the oven and watched caramel bubble through golden oat crumbles. The smell alone had my family circling the kitchen like hawks. These turtle bars became my most-requested dessert before I even cut the first square.
I made my first batch for a school bake sale and watched them vanish in under ten minutes. A mom I barely knew handed me cash and asked if I took orders. That was the moment I realized these bars had some kind of magic baked into them. Now I keep the ingredients stocked year round, just in case someone needs cheering up or I need an excuse to lick caramel off a spoon.
Ingredients
- All-purpose flour: Forms the tender base of the crust and gives structure to the crumble topping without making it cakey.
- Rolled oats: Add chew and a slight nuttiness that keeps the bars from feeling too rich or dense.
- Brown sugar: Brings molasses notes that deepen the caramel flavor and help the crust hold together.
- Granulated sugar: Balances the moisture and sweetness, ensuring the topping bakes up crisp and golden.
- Unsalted butter, melted: Binds the oat mixture into clumps and adds that essential buttery richness throughout.
- Salt: Sharpens every flavor and keeps the sweetness from overwhelming your palate.
- Baking soda: Helps the crust puff slightly and the topping turn golden without spreading too thin.
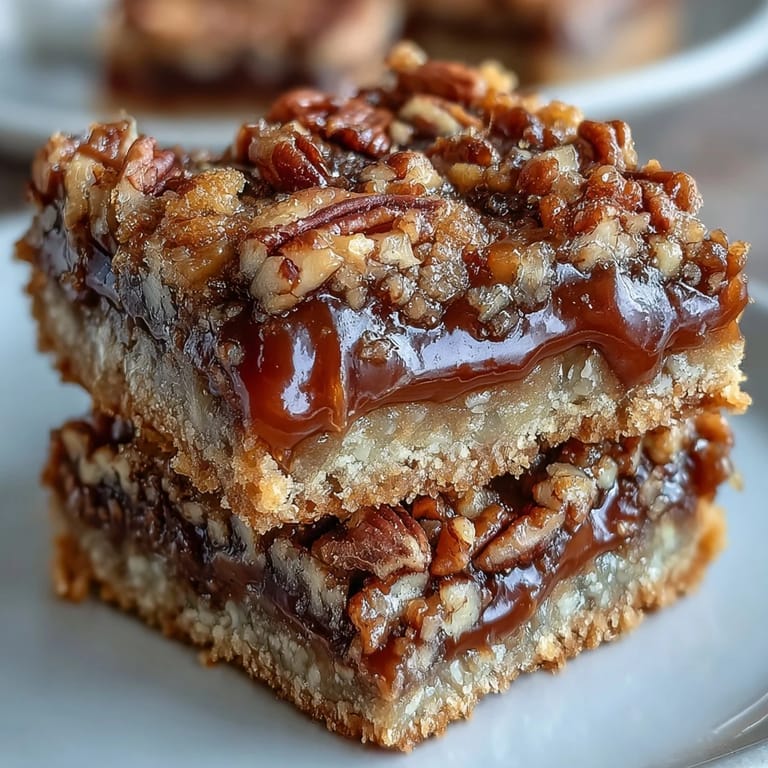
- Semi-sweet chocolate chips: Melt into the warm crust, creating a fudgy layer that contrasts with the caramel.
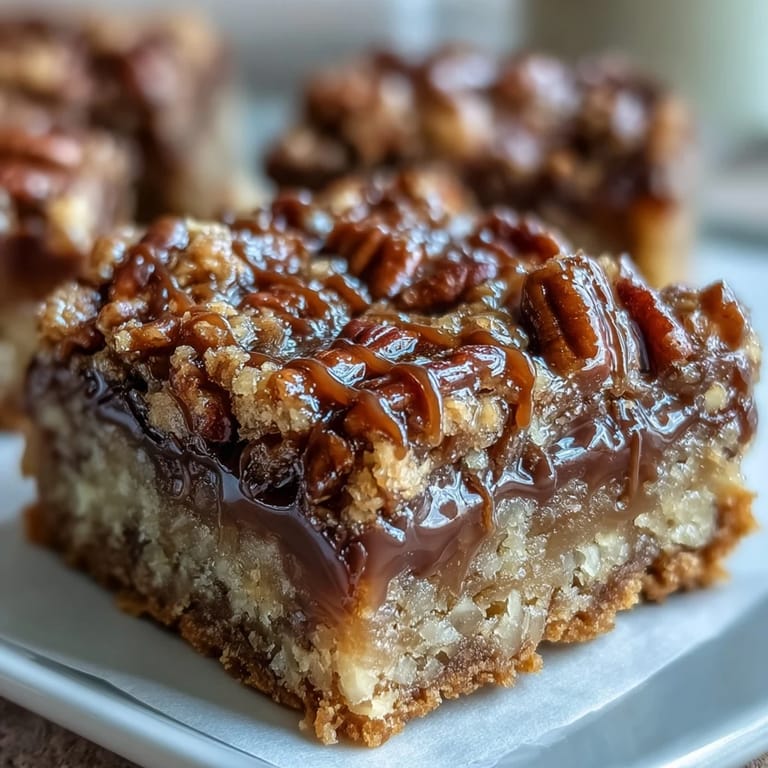
- Chopped pecans: Toast as they bake, adding crunch and a buttery, earthy flavor that defines turtle candy.
- Caramel sauce: The soul of the recipe, whether homemade or store bought, it weaves through every bite.
- Heavy cream: Thins the caramel just enough to pour smoothly and adds a silky, luxurious texture.
Tired of Takeout? 🥡
Get 10 meals you can make faster than delivery arrives. Seriously.
One email. No spam. Unsubscribe anytime.
Instructions
- Prep the Pan:
- Preheat your oven to 350 degrees F and grease a 9x9 inch baking pan generously with butter, or line it with parchment paper for easy lifting. A well prepped pan means you will lift out perfect squares instead of crumbly disasters.
- Make the Crumb Base:
- In a large mixing bowl, stir together the flour, oats, both sugars, melted butter, salt, and baking soda until the mixture looks like damp sand with pebbles. Reserve exactly 1 cup of this mixture in a small bowl for the topping, then press the rest firmly into the bottom of your prepared pan.
- Bake the Crust:
- Slide the pan into the oven and bake for 10 minutes, just until the edges start to turn golden and the kitchen smells like warm butter. This brief bake sets the crust so it does not get soggy under the caramel.
- Warm the Caramel:
- While the crust bakes, combine the caramel sauce and heavy cream in a small saucepan over medium low heat, stirring constantly until smooth and glossy. Remove it from the heat as soon as it is combined, you do not want it to boil.
- Layer the Fillings:
- Pull the warm crust from the oven and immediately scatter the chocolate chips evenly across the surface, then sprinkle the chopped pecans over the chocolate. Pour the warm caramel sauce slowly and evenly over everything, letting it pool into every gap.
- Add the Crumb Topping:
- Grab that reserved cup of crumb mixture and sprinkle it evenly over the caramel layer, covering as much surface as you can. The crumbs will bake into golden clusters that add texture and trap the caramel beneath.
- Bake Until Golden:
- Return the pan to the oven and bake for 15 to 20 minutes, until the topping turns a rich golden brown and the edges bubble gently. Watch closely in the final minutes to avoid burning the oats.
- Cool Completely:
- Set the pan on a wire rack and let it cool completely, at least 30 minutes, before cutting into squares. Patience here is everything, warm bars will crumble and caramel will ooze everywhere if you cut too soon.
 Save
Save I brought a pan of these to a potluck once and left with an empty dish and four requests for the recipe. One friend admitted she ate three bars standing at the dessert table, pretending to chat while sneaking bites. That is when I knew these were not just good, they were the kind of treat that makes people lose their manners and ask for seconds without shame.
How to Store and Serve
Once the bars are completely cool and cut, stack them in an airtight container with parchment paper between layers to prevent sticking. They keep at room temperature for up to a week, though in my house they rarely last three days. If you want to serve them warm, a quick ten second zap in the microwave will soften the caramel and make the chocolate melt all over again. For gifting, wrap individual bars in wax paper and tie them with twine for a homemade touch that feels special.
Customizing Your Bars
I have swapped pecans for walnuts when I ran out, and the bars turned out just as rich with a slightly earthier bite. You can also use dark chocolate chips instead of semi sweet for a less sugary, more grown up flavor that pairs beautifully with salted caramel. If you want to go wild, add a handful of toffee bits to the crumb topping or drizzle melted white chocolate over the cooled bars for extra drama. The base recipe is forgiving, so play around and make it your own without fear.
Troubleshooting Common Issues
If your bars turn out too crumbly, you probably did not press the crust hard enough or cut them before they cooled completely. If the caramel layer is too thin or disappears, make sure you are using a thick caramel sauce, not a runny syrup, and avoid overbaking which can cause it to soak into the crust. Sometimes the topping browns too fast, if that happens, tent the pan loosely with foil for the last few minutes of baking. These small adjustments will get you perfect bars every single time.
- Always let the bars cool fully before cutting, even if it feels impossible to wait.
- Check your caramel sauce consistency before pouring, it should coat a spoon and drip slowly.
- If the edges bake faster than the center, rotate the pan halfway through the final bake.
 Save
Save These turtle bars have become my answer to almost every occasion, from Tuesday night cravings to holiday cookie swaps. They are proof that the best recipes are the ones you can not stop making, even when you know you should probably try something new.
Recipe FAQs
- → Can I use homemade caramel sauce?
Yes, homemade caramel sauce works beautifully. If making your own, ensure it's slightly cooled but still pourable when adding the heavy cream so it blends smoothly without seizing.
- → How should I store these bars?
Keep them in an airtight container at room temperature for up to one week. The caramel remains soft and chewy, while the crumb topping stays crisp.
- → Can I substitute the pecans?
Absolutely. Walnuts or almonds work well as alternatives. Just chop them into similar-sized pieces so they distribute evenly throughout the caramel layer.
- → Why must the bars cool completely before cutting?
The caramel needs time to set as it cools. Cutting too soon will cause the layers to slide and the bars will lose their neat square shape.
- → Can I make these ahead for gatherings?
Yes, these actually taste better the next day as the flavors meld together. Prepare them up to 24 hours in advance, store covered, and serve at room temperature.
- → What's the best way to get clean cuts?
Use a sharp knife and wipe it clean between cuts. For extra precision, chill the pan briefly before slicing, then bring bars back to room temperature to serve.